Well. It has been a while hasn’t it.
Far longer than I ever wanted.
Time to get this back on track.
Recreating the home of Atrus
Well. It has been a while hasn’t it.
Far longer than I ever wanted.
Time to get this back on track.
Exile came out 19 years ago.
And it was 2 years ago since I started this project.
And over a year since my last post.
This project isn’t dead, I promise.
There have been set backs and bumps in the road that keep me from spending anywhere near as much time on this as I would like. So this site has been sitting here like a log.
But I have been quietly working on things in the background whenever I could.
In the intervening time between posts I have vacillated to some degree about potentially ditching UE4.
The big roadblock I was hitting with Tomahna was in getting lighting and materials to match the original game. UE4 can create stunning visuals, but I am trying to do a recreation that is as close to a 100% visual reproduction of the original as possible. And I really feel like I’m fighting with Unreal. Lighting is such a critical element, and I don’t feel like I have good control of it with UE4.

I was also having trouble on the backend. Actual coding (not blueprints) in Unreal is painful. Getting a VR setup working correctly can also be painful. Unity is better for both. But Unity has significant drawbacks. Unreal is also such a massive, heavy, kinda bloated feeling engine. It takes forever just to load the editor, movement feels laggy and slow to respond even with test scenes.
I’ve been exploring Godot for the last year. It’s come a long way and I really like it at this point, but it’s not yet mature enough to be used for this project. But maybe when version 4.0 is released later this year… Stay tuned.
Frustrated by my lack of meaningful progress in getting the high fidelity visuals I wanted, I spent time focusing more on areas that not directly related to the original scope of this project (which was just those two little rooms in Tomahna).
Last time I posted I was still struggling with getting good results with photogrammetry, which is really important for a good recreation of the larger worlds from the game. Most of the software out there is not geared for panoramas, and I was trying to figure out how to roll my own solution.
Fortunately I finally did find (relatively) functional solution.
Agisoft’s Metashape (previously Photoscan).

I feel a little silly about it, since it’s one of the big names in photogrammetry software, and it support’s spherical (equirectangular) panoramas. A few years ago I was trying a whole bunch of different things. I remember attempting to use Photoscan. I tested out the feature using the panoramas from Tomahna (which needed to be reprojected) as well as the frames from the flyby. I got pretty terrible results, and became discouraged with Photoscan and moved on.
In hindsight I was clearly testing the feature with too small a dataset. And the compression from the frames of Tomahna’s flyby are particularly bad. So it’s not surprising (now) that I got such awful results. Garbage in, garbage out, as they say.
A little while after my last post, in a fit of frustration I did another survey of the photogrammetry software. Somehow after all this time, 360 panorama support is pretty dire (and forget directly using cubemaps). Reality Capture still doesn’t offer support for them, after years of rumors that is was an upcoming feature. Photoscan (now Metashape) still seems to be the only game in town that offers some kind of support for spherical cameras.
So I decided to give it another try. But this time I had a much larger data set. And this time I got much better results.
Enough talk, I think some pictures are in order.


Unfortunately, this isn’t a silver bullet.
The whole process depends on a lot of redundancy between different views of the scene. It works quite well when the panoramas are situated in a scene in such a way that they are all surrounded by the same environment like inside a room, inside a chasm. But it simply doesn’t work if there are too few panoramas in a place (like Tomahna). When the panoramas are surrounding something large or in a daisy chain (a cave or passage, or transition from interior to exterior) it also breaks down. The result is a collection of different areas that need to be manually adjusted to relate properly to each other.
Additionally, Metashape seems unable to align still images with the nodes. I’m not sure if there is something I could be doing differently that might get it working. But as it stands it means FMV and flybys require an enormous amount of manual work to get the cameras where they are supposed to be, and it doesn’t benefit the reconstructed mesh as much as I think it otherwise could. As an example I can get all the panoramas in an area like the exterior of Jnanin automatically aligned, and I can get the frames of the flybys from Jnanin aligned with themselves, but getting them aligned together is requires manually marking reference points on each frame, which is tedious and takes a lot of time.
On top of that Metashape has the concept of a chunk (really just a collection of images that produce a model). Each section of a scene can have it’s own chunk, and they can be aligned. Which is great, that’s exactly what is needed for this project. But Metashape’s interface feels incredibly limited in how you can interact with the chunks. In fact I found myself needing to delve into making python scripts to do things that seem pretty damn basic.
It makes the process of aligning and orchestrating these different sections of a scene into a single whole rather painful. That needs to be completed before the reconstructions are finalized and used as a basis for the creation of new assets. For this project to move to the next level a large amount of manual work in Metashape will need to be completed.
I’m pretty sure it’s going to have to be dragged across the finish line.
Today marks the 19th year since Myst 3 Exile was released. Happy Birthday!

I would like to say thank you to everyone who worked at Presto for creating a great game.
I wanted to delve a little into the process I was using for reconstructing the scene from the game.
When doing a project like this, the most important things you want to know are:
-The positions of the original cameras that rendered the scene
-The positions of the surfaces in a scene.
When I first played with some photogrammetry software, and realized I could attempt to apply it to something like this, I was hoping to have an automated process that could give me the two things I really needed.
While the quality (rather the lack of it) of any automated reconstruction would prevent it from ever being used as an asset in a proper remake of a game like Exile, the value it holds as a guide in creating those proper assets is immense. It would save enormous amounts of time and effort, and help ensure the recreation is as close to the original as possible.
Unfortunately I haven’t been able to find a freely available process to perform such a reconstruction, or even properly calculate the camera positions using panoramic images (I’ll be posting more about that in the future).
What is freely available is geared more toward structure-from-motion (SFM) or massive collections of overlapping images from many vantage points. Even then it is rather tricky to get good quality.

So without an automated way to get the camera positions, I decided to do it manually.


This is the painstaking bit. Since Presto rendered all the nodes in Exile in the same orientation, it really comes down to working out the xyz location of each node. Even so, it’s a huge pain just to get that one aspect just right.
The goal is to put a shape in the scene representing a given object that appears in different cubemaps, and adjusting the position of those cubes/cameras so that the shape looks correct for each cubemap
There are a number of assumptions you can reasonably make in a scene like this. The floor is flat and in the same plane for the majority of the scene. Each node doesn’t seem to have any change in elevation. So I assume each node is on the same plane. I assume this plane is about 1.5 meters from the ground ( average eye level) so I set each node/camera at that height.
Then I designate a particular node as special, I keep it at the origin, and I will arrange the rest of the nodes relative to it to avoid things getting to crazy and out of hand (In this case I chose the one in the middle of the sunroom for convenience). So let’s call this Node A. So Node A has a position of (0, 0, 1.5).
I then outlined the pattern on the floor (which is at a height of 0 – where it should actually sit in the scene). I can look through Node B and see the same outline and the same floor pattern in the cubemap image (but from a differing vantage point). Then I slide the node around without altering it’s height (so laterally – in the x/y direction) until that pattern is properly aligned with it’s appearance in the background image.
This process works rather well in this case because I was able to make those assumptions about the floor. Otherwise, when you have changes in elevations between nodes, you end up with a bit of a feedback loop where you need use several different points of reference (say patterns/shapes on the ceilings, walls and floors) and adjust them until both you can get multiple points of reference to appear in the correct spots for each cubemap.
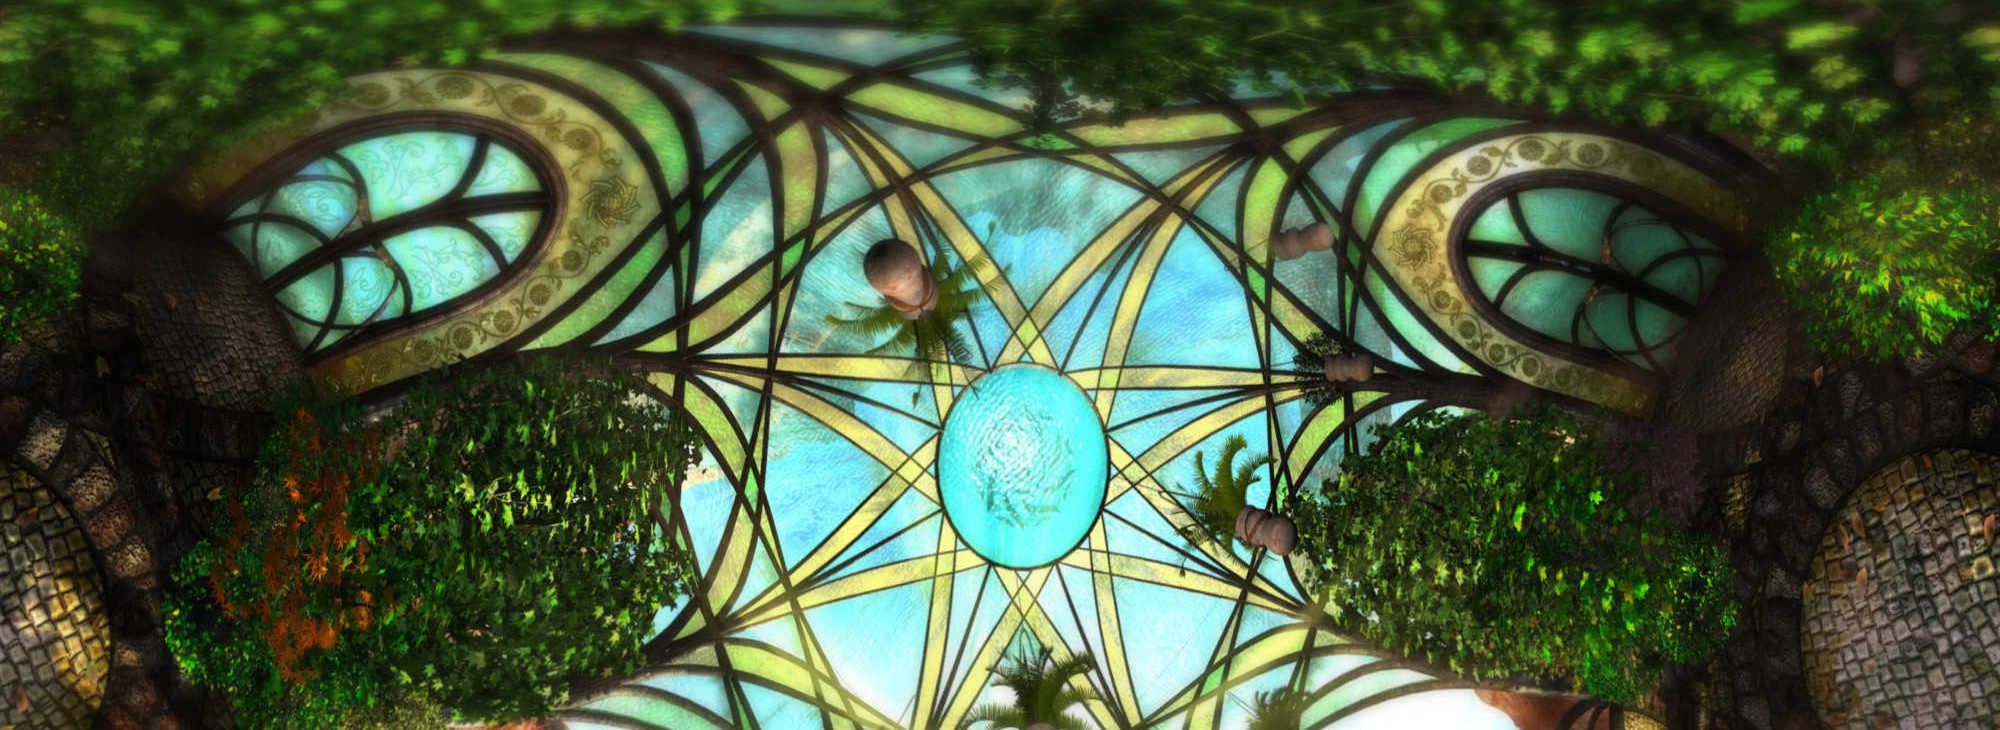
At this point, once you lock down the camera positions, it becomes easier to work out/ reason about the location of any given object in the scene. This can be rather painstaking itself, but I find it more fun. It was an interesting challenge creating the mesh for the sunroom’s dome, I used splines to extrude a shape and could twist and taper it along it’s height, and used that to create the branch like supports, the whole time seeing them overlayed on top of the original game images from multiple views, so I could verify I had the shape right as I was editing it.

Ultimately it’s a clunky and painful process. I decided to go for it since I only needed to work with 4 nodes. Once you have a significant number (say 20 or more) it becomes a very very difficult process to do this manually.
It feels like trying to solve a jigsaw puzzle where all the interlocking stubs on the pieces are just a few millimeters off, so you know you’ve got the right pieces, in the right general area, but you can’t get the whole picture to fit together.
It was reasonably suited for a scene like Tomahna, but I really want something better if I try tackling anything else in the game. (I’ll be posting more about potential solutions)
Sorry, I’ve been distracted with personal stuff and other side projects for quite a while. Hopefully I’ll be able to spend some more time on this project.
I modeled this back in June, and figured I’d do a quick render with Blender cycles. I just wanted to get more visual content on here. I’ve done a fair amount of work on many parts of the study and sunroom, but much of it’s not in a finished state (or doesn’t look as good as I want). Plus it’s easy to make something look good in cycles. It’s a little bit trickier in Unreal.
I’ll do a more detailed post on this a little later.

Here are the original versions for comparison.
(concept art, Exile, Revelation)

This site isn’t dead! I promise!
I’ve been busy with personal stuff for the last couple months, and I don’t always post while I’m working on stuff for this project.
Going to add a quick post of something I meant to post before, but didn’t get around to it.